 HarleyMotorcycleParts
Nightster (XL1200N) Rear Shocks: Make Sure It Is the Air-Cooled One
Two Harleys are called Nightster. Only the XL1200N Sportster takes the job on this page.
Harley reused the name, and search results are full of the confusion it caused. Two different motorcycles are called Nightster: the older air-cooled XL1200N, and a much newer water-cooled bike on another platform. Parts sold for one do not suit the other, and neither do the instructions. So before reading anything about shocks, go and look. If there is a radiator on the bike, this page is not for you. If it shows XL1200N, carry on.
Tools
- Vehicle paperwork
- SAE ratchet set
- Torque wrench
- Lift for the frame
- Rule for fender gap
- Service manual
Three-minute identification
Check your registration or title for the code. Look at the engine as well. Cooling fins on a classic V-twin and two rear shocks that you can see from the side, between frame and swingarm, both point to the XL1200N.
When searching for parts, include the code and do not rely on the word Nightster. A listing without a code may be aimed at either bike, and a seller may not know there is a difference.
Once the code is confirmed, save a picture of it on your phone. It takes seconds, and it means that you can quote it at a parts counter or in an online chat, with no need to go back out to the garage for it.
Used examples may also have been modified. So give the shocks on it a close look, and do not assume that they are original.
A bobbed rear and what it limits
The fender is bobbed, and this bike has the same limited travel the rest of the low Sportsters live with. Take a rule to the gap at the closest point, then read it again with you sitting on the bike.
Note what those numbers leave for the road ahead. Short shocks bottom more easily, and when they do, that fender is the first thing the tyre looks for.
A longer unit opens up that gap, but it changes cornering clearance and how the bike rests on its stand, and may also change the belt tension reading. Consider who rides it and whether a passenger comes along, then choose based on that load.
Be careful with comfort claims as well. A softer spring lets the wheel climb nearer the fender just as a shorter shock does, so any softer option deserves the same measuring as a change in length.
Taking the weight off
A level floor comes first. Bring a lift in below the frame, keep the pads clear of the exhaust and stop as soon as the rear rubber loses its load. Wedge a block beneath it so that the swingarm cannot droop.
Finish with a strap over the seat area or around the frame, whichever your lift allows, and give it a shove. If anything moves, reset it before going on.
Take a look at the tyre while it is in the air, too. Check for wear or a nail, since this is the easiest moment to spot either, and the rear wheel is rarely this free for inspection during normal ownership.
Shock number one
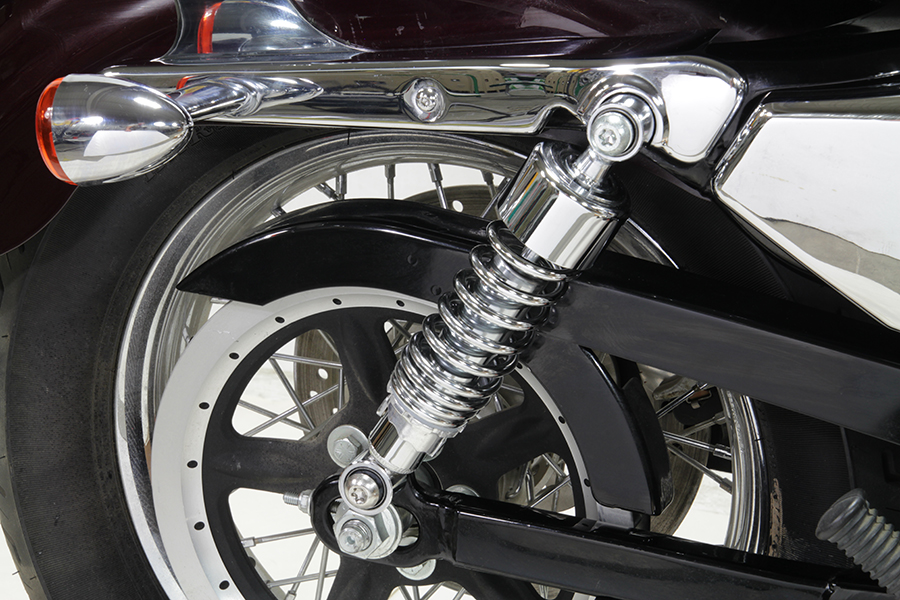
Before taking anything off, look for the odd detail: a turned-in adjuster, a different spacer on one side, any paint marks from a past owner. Photograph them. Then loosen the upper fixing and the lower, keeping every part in sequence.
Slide it away, leaving the second shock bolted on and tight. Working singly in this way, the swingarm has no chance of dropping and the job stays calm.
Note how much room you needed for the socket. If the opposite side has the exhaust in the way, you now know what to expect there.
Bushings, fixings, frame
Clean the bare mount and take your time. Sound hardware looks even, with no ridge worn into it and no chewed threads. It should not shift when you push on it.
Bushings tell a similar story. They should be intact and able to spring back. Hard, torn or lopsided rubber goes in the bin. It takes little time to deal with it now, and a knock from a dead bushing is annoying to trace later.
The new unit goes up
Set the block height so the eye meets its mount easily, then push it home and add the hardware as you recorded it. Spin it up by hand.
Your year-specific service manual has the torque number for these fixings. Set the wrench to it. Do not take the number from a water-cooled Nightster page, for obvious reasons. Then work through the exhaust side, using whichever tool fits. Finish by matching any preload adjustment across both sides.
Afterwards
Once it is on the ground, measure the fender gap again, loaded and unloaded. Compare the results with what you wrote at the start. If length changed, check the belt against the manual and see how the side stand now holds it.
On a short ride, listen for a knock over small bumps. Come home, shine a light under the fender for scuff marks, and put the wrench back on each fixing one final time.
Mistakes that cost money
- Ordering parts for the wrong Nightster.
- Searching by name without the XL1200N code.
- Assuming the shocks on a used bike are original.
- Ignoring the small bobbed fender gap when choosing length.
- Using a torque figure from a page about the other bike.
When to stop
If the rear tyre has marked the fender or the identification still leaves you unsure, stop and find out. Bolting on parts for the wrong bike is how a simple job becomes a dangerous one.
Parts for this job
Check fitment for your own model and year before ordering — add your bike and we will flag what fits.
Other Harley how-to guides
This guide covers procedure and judgement. Torque figures, fluid capacities, gaps and tension settings are specific to your model and year and must come from the factory service manual for your motorcycle — we deliberately do not print numbers we cannot stand behind for your bike. Independent aftermarket retailer, not affiliated with Harley-Davidson, Inc.